
Get your FreshBooks API credentials in under 10 minutes with this step-by-step guide covering OAuth setup, app registration, scopes, and the identity model quirks that trip developers up.
What's FreshBooks?
FreshBooks is cloud-based accounting software built for freelancers and small businesses who want invoicing that doesn't make them hate their lives. It handles invoices, expenses, time tracking, and basic accounting. The interface is clean, the mobile app actually works, and it won't overwhelm you with features you'll never use.
You're here because you need to connect FreshBooks to your application, sync invoice data, or automate billing workflows. Here's how to get API access.
Note: FreshBooks doesn't use traditional API keys. It uses OAuth 2.0 authentication with a Client ID and Client Secret. This guide walks you through creating an application and obtaining those credentials.
Prerequisites
- FreshBooks account (trial or paid, doesn't matter)
- A redirect URI ready (even
http://localhostworks for testing) - Basic understanding of OAuth flows, or at least a willingness to learn
Step 1: Access the Developer Portal
Go to https://my.freshbooks.com/#/developer and log in with your FreshBooks account.
If you don't see the developer section, make sure you're logged into an account with admin access. FreshBooks doesn't surface developer tools to every user by default.
Step 2: Create a New Application
Click Create New App in the developer portal.
Fill in the required fields:
- Application Name: Something descriptive. "My Invoice Integration" beats "Test App 1" when you're staring at it six months from now.
- Application Type: Select based on your use case. Most integrations use "Web Application."
- Redirect URI: Where FreshBooks sends users after authorization. For testing, use
http://localhost:8000/callbackor similar. For production, this must be HTTPS.
The redirect URI needs to match exactly when you make authorization requests later. Trailing slashes matter. HTTP vs HTTPS matters. Get it right now or debug it forever.
Step 3: Configure Scopes
Select the scopes your application needs. FreshBooks is granular here, which is good for security but means you need to think about what data you actually require.
Common scopes:
user:profile:read- Required to get identity informationuser:clients:readanduser:clients:write- Customer managementuser:invoices:readanduser:invoices:write- Invoice accessuser:expenses:read- Expense trackinguser:payments:read- Payment data
Request only what you need. Over-scoped apps make users nervous at the consent screen, and nervous users don't click "Allow."
Step 4: Save and Get Your Credentials
Click Save to create your application.
Now click on your newly created app. Scroll to the bottom under App Settings. You'll see:
- Client ID: Your application's public identifier
- Client Secret: Your application's private key
Copy both immediately and store them securely. If you lose the Client Secret, you'll need to regenerate it, which invalidates any existing tokens.
Step 5: Build Your Authorization URL
FreshBooks uses the standard OAuth 2.0 authorization code flow. Your authorization URL looks like this:
https://auth.freshbooks.com/oauth/authorize/?response_type=code&redirect_uri=YOUR_REDIRECT_URI&client_id=YOUR_CLIENT_ID
Replace the placeholders with your actual values. When a user visits this URL, they'll see the FreshBooks login page, then a consent screen showing what your app wants to access.
Step 6: Exchange the Code for Tokens
After the user authorizes your app, FreshBooks redirects them to your redirect URI with a code parameter. Exchange this code for tokens:
curl -X POST 'https://api.freshbooks.com/auth/oauth/token' \
  -H 'Content-Type: application/json' \
  -d '{
    "grant_type": "authorization_code",
    "client_id": "YOUR_CLIENT_ID",
    "client_secret": "YOUR_CLIENT_SECRET",
    "code": "THE_AUTHORIZATION_CODE",
    "redirect_uri": "YOUR_REDIRECT_URI"
  }'
You'll get back:
- access_token: Use this in API requests. Expires in about 12 hours.
- refresh_token: Use this to get new access tokens without re-authorization.
Store both securely. The refresh token is your long-term credential.
The Identity Model Quirk
Here's where FreshBooks gets weird. Before you can make most API calls, you need to understand the account and business ID structure.
After getting your tokens, call the identity endpoint:
curl -X GET 'https://api.freshbooks.com/auth/api/v1/users/me' \
  -H 'Authorization: Bearer YOUR_ACCESS_TOKEN'
This returns your user profile with business_memberships. Each membership contains an account_id and business_id. You'll need these for API calls, as most endpoints use the pattern:
https://api.freshbooks.com/accounting/account/{account_id}/...
A single FreshBooks user can belong to multiple businesses. Your integration needs to handle this or ask users which business they want to connect.
Common Mistakes
Wrong redirect URI: It must match character-for-character. The error message won't tell you this clearly.
Expired tokens: Access tokens last about 12 hours. Implement token refresh or your integration dies every morning.
Forgetting the account ID: Every accounting endpoint needs it. Parse the identity response and store it alongside your tokens.
HTTP redirect URIs in production: FreshBooks requires HTTPS for production apps. HTTP only works for localhost during development.
Scope creep: Requesting every scope "just in case" tanks your authorization rate. Start minimal and add scopes when you actually need them.
Refreshing Tokens
Access tokens expire. Use the refresh token to get new ones:
curl -X POST 'https://api.freshbooks.com/auth/oauth/token' \
  -H 'Content-Type: application/json' \
  -d '{
    "grant_type": "refresh_token",
    "client_id": "YOUR_CLIENT_ID",
    "client_secret": "YOUR_CLIENT_SECRET",
    "refresh_token": "YOUR_REFRESH_TOKEN",
    "redirect_uri": "YOUR_REDIRECT_URI"
  }'
You'll get a new access token and a new refresh token. Replace the old refresh token with the new one. The old one is now invalid.
Testing Your Connection
Make a simple API call to verify everything works:
curl -X GET 'https://api.freshbooks.com/accounting/account/{account_id}/users/clients' \
  -H 'Authorization: Bearer YOUR_ACCESS_TOKEN' \
  -H 'Content-Type: application/json'
If you get JSON back with client data (or an empty array if you have no clients), you're connected. If you get a 401, check your token. If you get a 403, check your scopes.
Managing FreshBooks API Connectivity with Apideck's Vault
If you're building integrations with FreshBooks and other accounting platforms, managing OAuth flows for each one gets old fast. Apideck's Vault handles the tedious parts:
- Automatic token refresh: No more 2 AM alerts because tokens expired.
- Pre-built authorization UI: Drop in a component and let users connect their accounts without building consent flows yourself.
- Unified connection management: Track connection states across FreshBooks, QuickBooks, Xero, and 25+ other platforms from one dashboard.
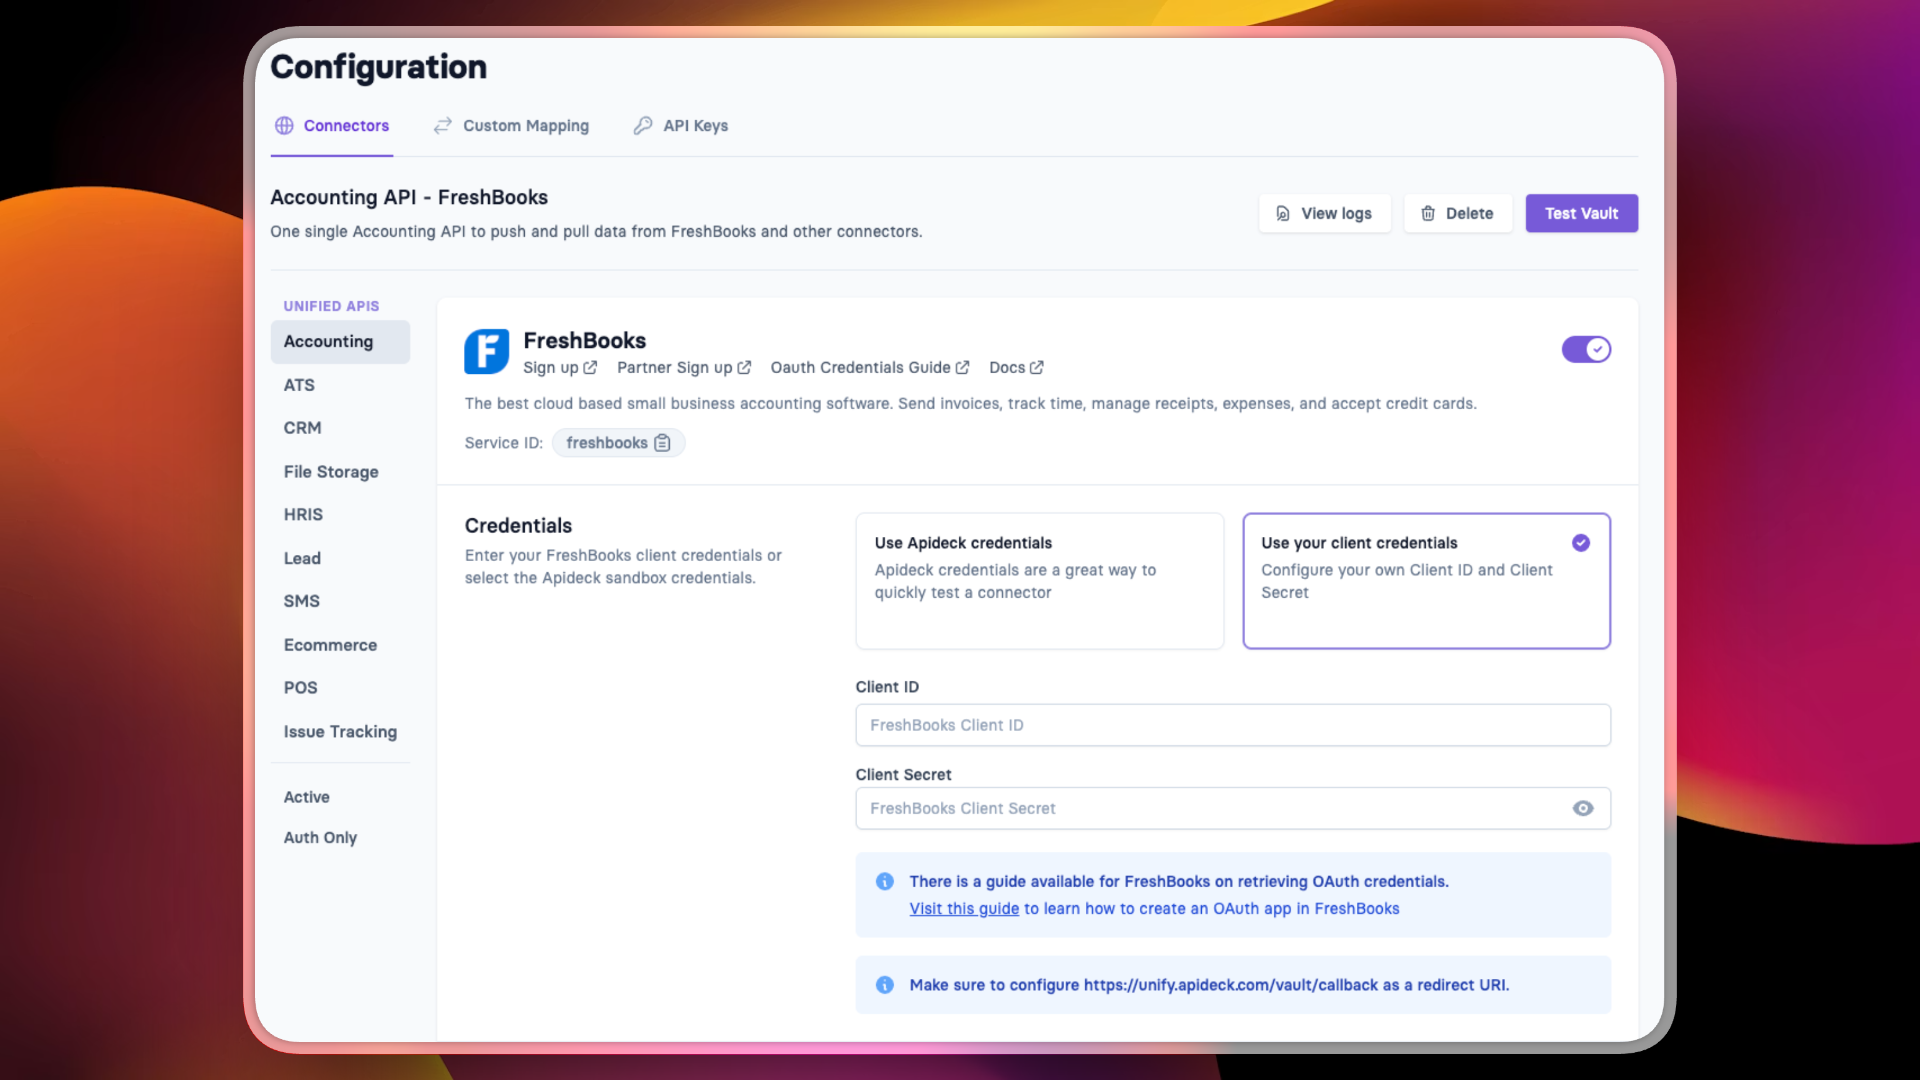
In the Apideck dashboard, go to Configuration and select the FreshBooks connector under Accounting. Choose "Use your client credentials" and enter the Client ID and Client Secret from your FreshBooks app. Note the redirect URI at the bottom: https://unify.apideck.com/vault/callback. Add this to your FreshBooks app's allowed redirect URIs.
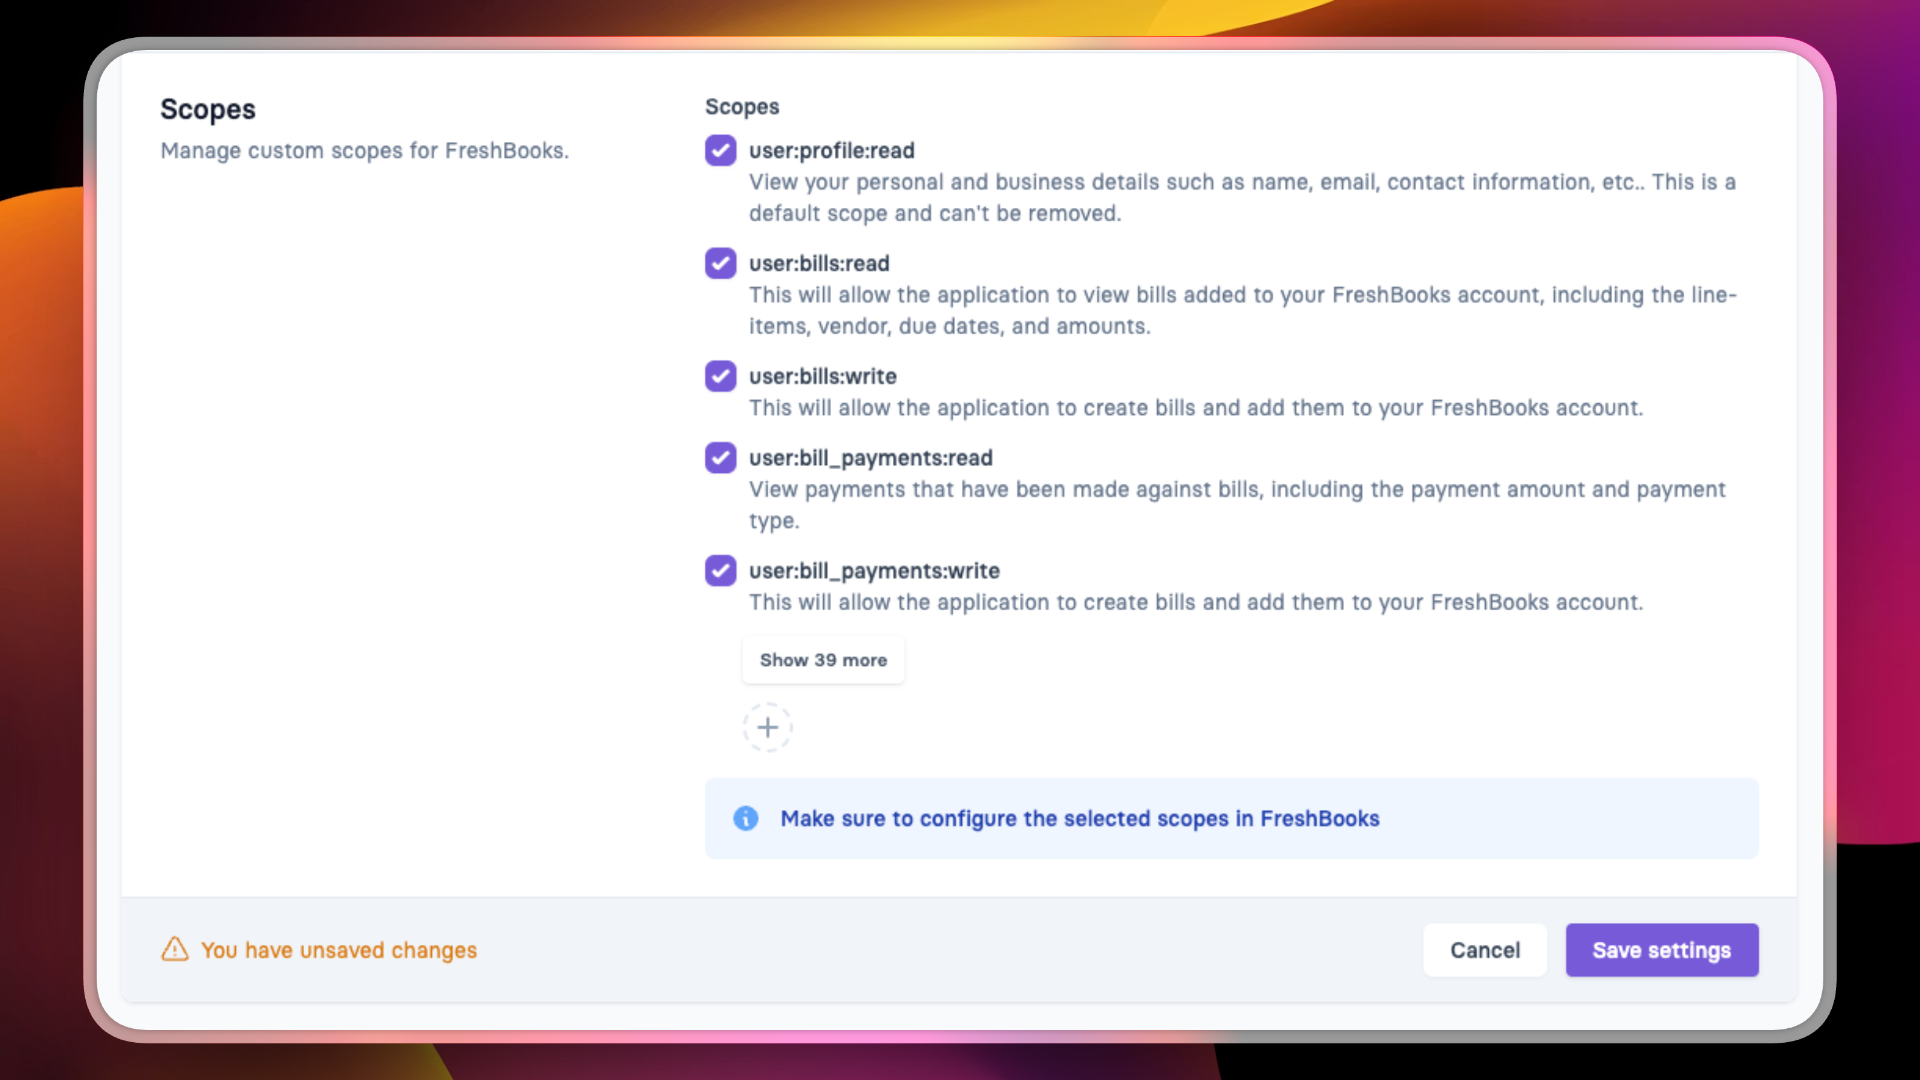
Scroll down to configure scopes. Select the permissions your integration needs. The scopes here must match what you configured in your FreshBooks app.
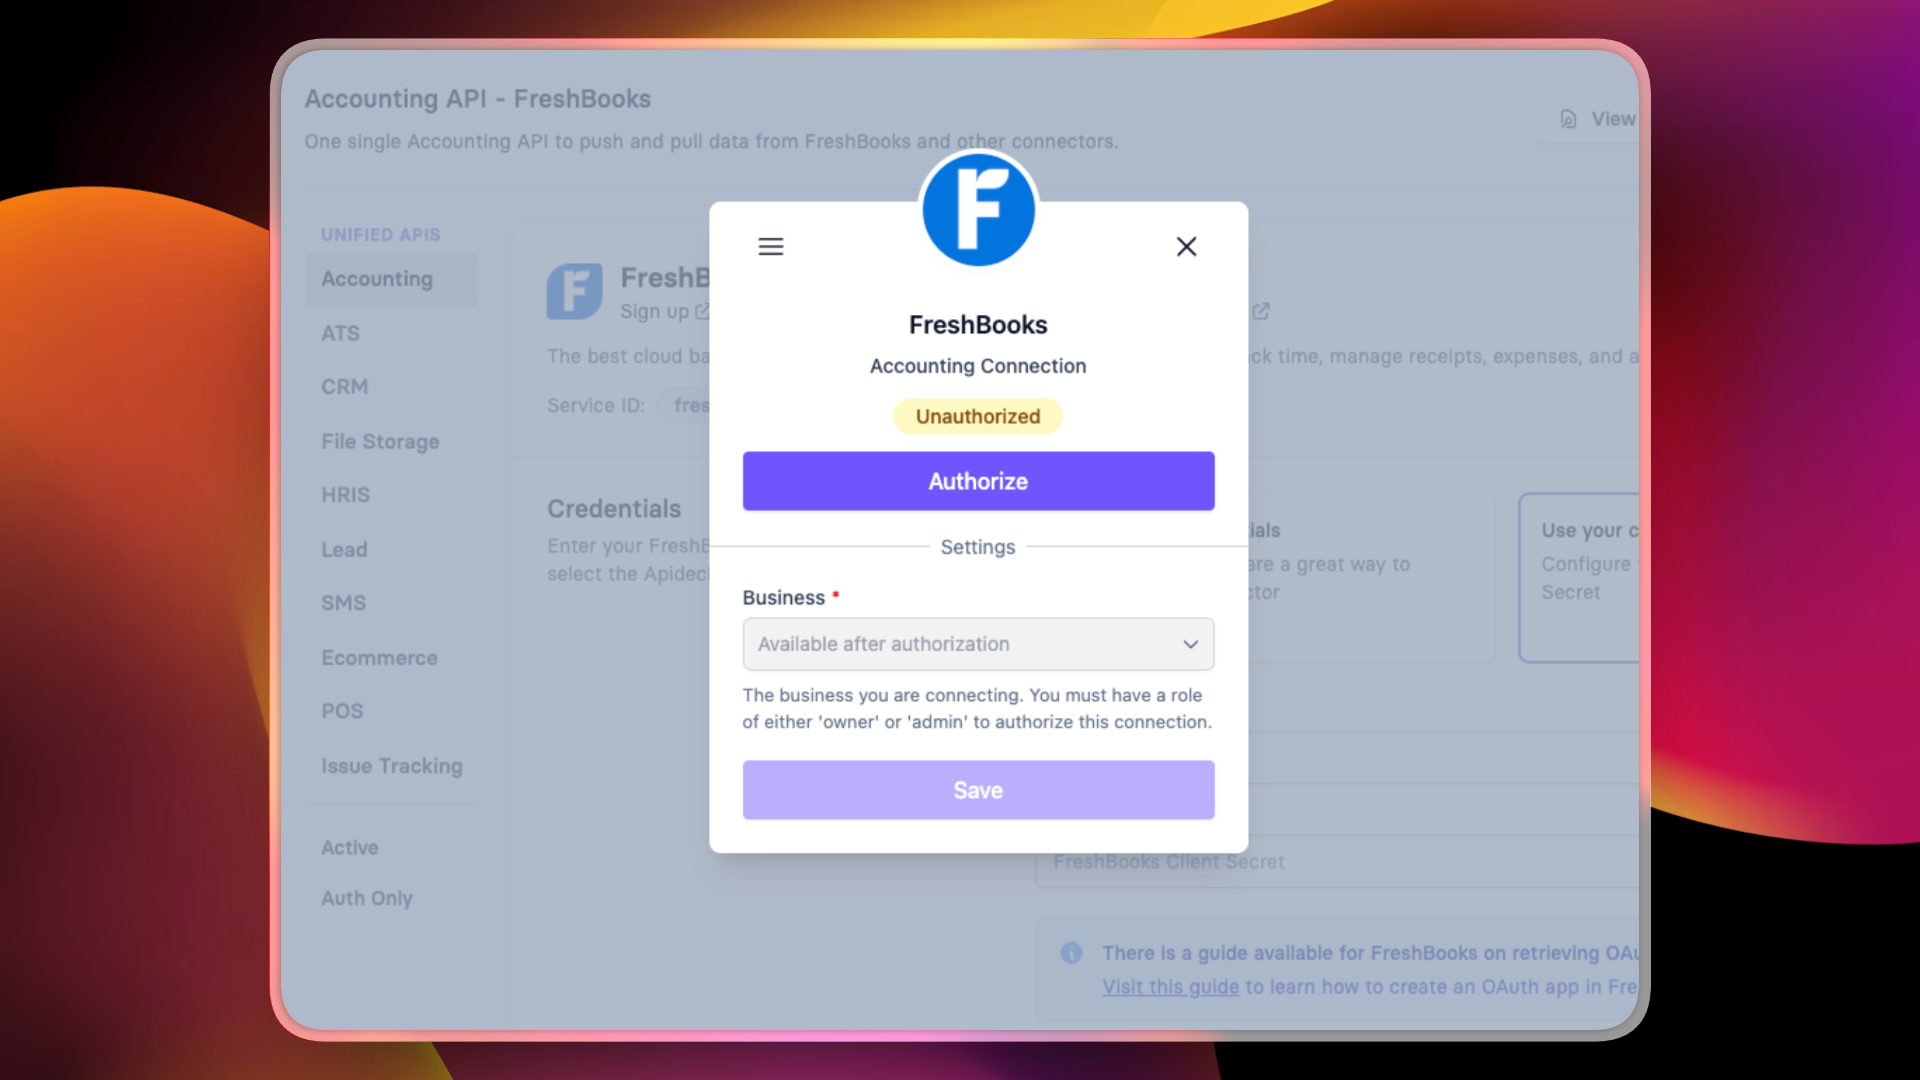
Click Save settings. Then click Test Vault in the top right to see the authorization flow your users will experience. The modal shows the connection status and an Authorize button. After authorization, users select which FreshBooks business to connect.
Your users click Authorize, authenticate with FreshBooks, and you get a working connection without writing token management code.
For a deeper look at FreshBooks integration patterns, check out the FreshBooks integration guide. If you're comparing accounting APIs, the QuickBooks API key guide and Xero API key guide cover similar ground for those platforms.
Create a free Apideck account to get started.
Ready to get started?
Scale your integration strategy and deliver the integrations your customers need in record time.


