What's Xero?
Xero is cloud accounting software for small to medium businesses who think QuickBooks is ugly and want something that actually works. It handles invoicing, bank reconciliation, expense tracking, and payroll. All the standard accounting stuff, but with a UI that doesn't make you want to quit. You're here because you need to connect Xero to your app, sync data, or automate workflows. Here's how to get API access in under 10 minutes.
Note: Xero doesn't use traditional API keys. Instead, it uses OAuth 2.0 authentication with Client ID and Client Secret credentials. This guide walks you through obtaining those credentials and setting up the OAuth flow.
Prerequisites
- Xero account (any plan, even a trial works)
- Know if you're building for just yourself or multiple organizations
- Developer account (free, takes 30 seconds to create)
Step 1: Create a Xero Developer Account
Go to https://developer.xero.com and sign up. Use the same email address as your Xero account to avoid confusion later.
Step 2: Create Your App
Hit MyApps → New app
Fill this out:
- App name: Something you'll recognize in 6 months
- Company or application URL: Your website (or use http://localhost for testing)
- OAuth 2.0 redirect URI: Where Xero sends users after auth
- Testing: http://localhost:8080/callback
- Production: https://yourapp.com/auth/xero/callback
Pick your integration type:
- Web app: For multi-tenant apps serving multiple Xero orgs
- Desktop or mobile app: For PKCE flow without client secrets
- Custom connection: For internal tools accessing only YOUR organization
Save it. You get a Client ID immediately.
Step 3: Get Your Client Secret
Click your app name, then Configuration.
Generate a client secret. Copy it now. Xero shows it once, then it's gone forever.
Step 4: Set Up Scopes
Still in Configuration, select the scopes you need:
- accounting.transactions: Read/write invoices, bills, payments
- accounting.contacts: Customer and supplier data
- accounting.settings: Company info and preferences
- offline_access: Refresh tokens that don't expire in 30 minutes
Don't be greedy. Pick only what you need or users will bail at the consent screen.
Step 5: Connect Your Organization
For testing with your own org:
- Click Authorize in your app dashboard
- Select your organization
- Approve the permissions
- You're redirected to your callback URL with an authorization code
Step 6: Exchange Code for Tokens
POST the authorization code to Xero's token endpoint. You get:
- Access token (expires in 30 minutes)
- Refresh token (expires in 60 days if unused)
- ID token (contains user and tenant info)
Store the tenant ID from the connections endpoint—you need it for every API call.
Common Screwups to Avoid
-
Wrong Redirect URI: Must match EXACTLY what's in your app config. Trailing slashes matter. http vs https matters.
-
Expired Tokens: Access tokens die in 30 minutes. Implement refresh token rotation or your integration breaks during lunch.
-
Missing Tenant ID: Every API call needs the tenant ID in headers. No tenant ID = 401 errors.
-
Rate Limits:
- Minute limit: 60 calls
- Daily limit: 5000 calls
- Hit these = 429 errors for up to 60 seconds
-
Sandbox vs Production: Xero has a Demo Company for testing. Use it. Don't test on real books like an amateur.
App Types: Which One?
- Custom Connection: You're building internal tools for YOUR company only
- Public App: You're building for multiple Xero organizations
- Partner App: You want to be listed in Xero's app marketplace (requires approval)
Pick one. Stop overthinking it. If you want a detailed guide on the partner app, please check out our guide here.
Testing Your Connection
- Use the Demo Company (create one in your Xero account)
- Make a simple GET request to /api.xro/2.0/organisation
- If you get JSON back with your company details, you're connected
- If you get 401, check your tenant ID and token
Security Requirements That Actually Matter
- Store tokens encrypted, not in plain text
- Use PKCE for mobile/desktop apps (no client secret needed)
- Rotate refresh tokens before they expire
- Never commit credentials to git (use environment variables)
That's it. You now have Xero API access. Stop reading documentation and start pulling data.
And if you want to know more about Xero authentication, integration, and bank feeds, check out the guides below:
- Bank Feeds Guide: https://developers.apideck.com/guides/bank-feeds-xero
- Authentication and Account Receivables Guide: https://www.apideck.com/blog/xero-integration-authentication-and-accounts-receivable-best-practices#challenges-and-complexities-of-integrating-with-the-xero-api
Managing Xero API connectivity with Apideck's Vault
If you want to integrate with Xero and other accounting systems, managing API connections can be challenging. You can use Apideck to connect to accounting applications. Apideck's Vault allows for:
- Secure credential storage with automatic token refresh - No need to build token management infrastructure or handle OAuth flows manually.
- Pre-built authentication UI - Embedded Vault components handle credential input and OAuth authorization without custom UI development.
- Centralized connection monitoring - Track connection states, validate credentials, and manage multiple accounting platforms from a single dashboard.
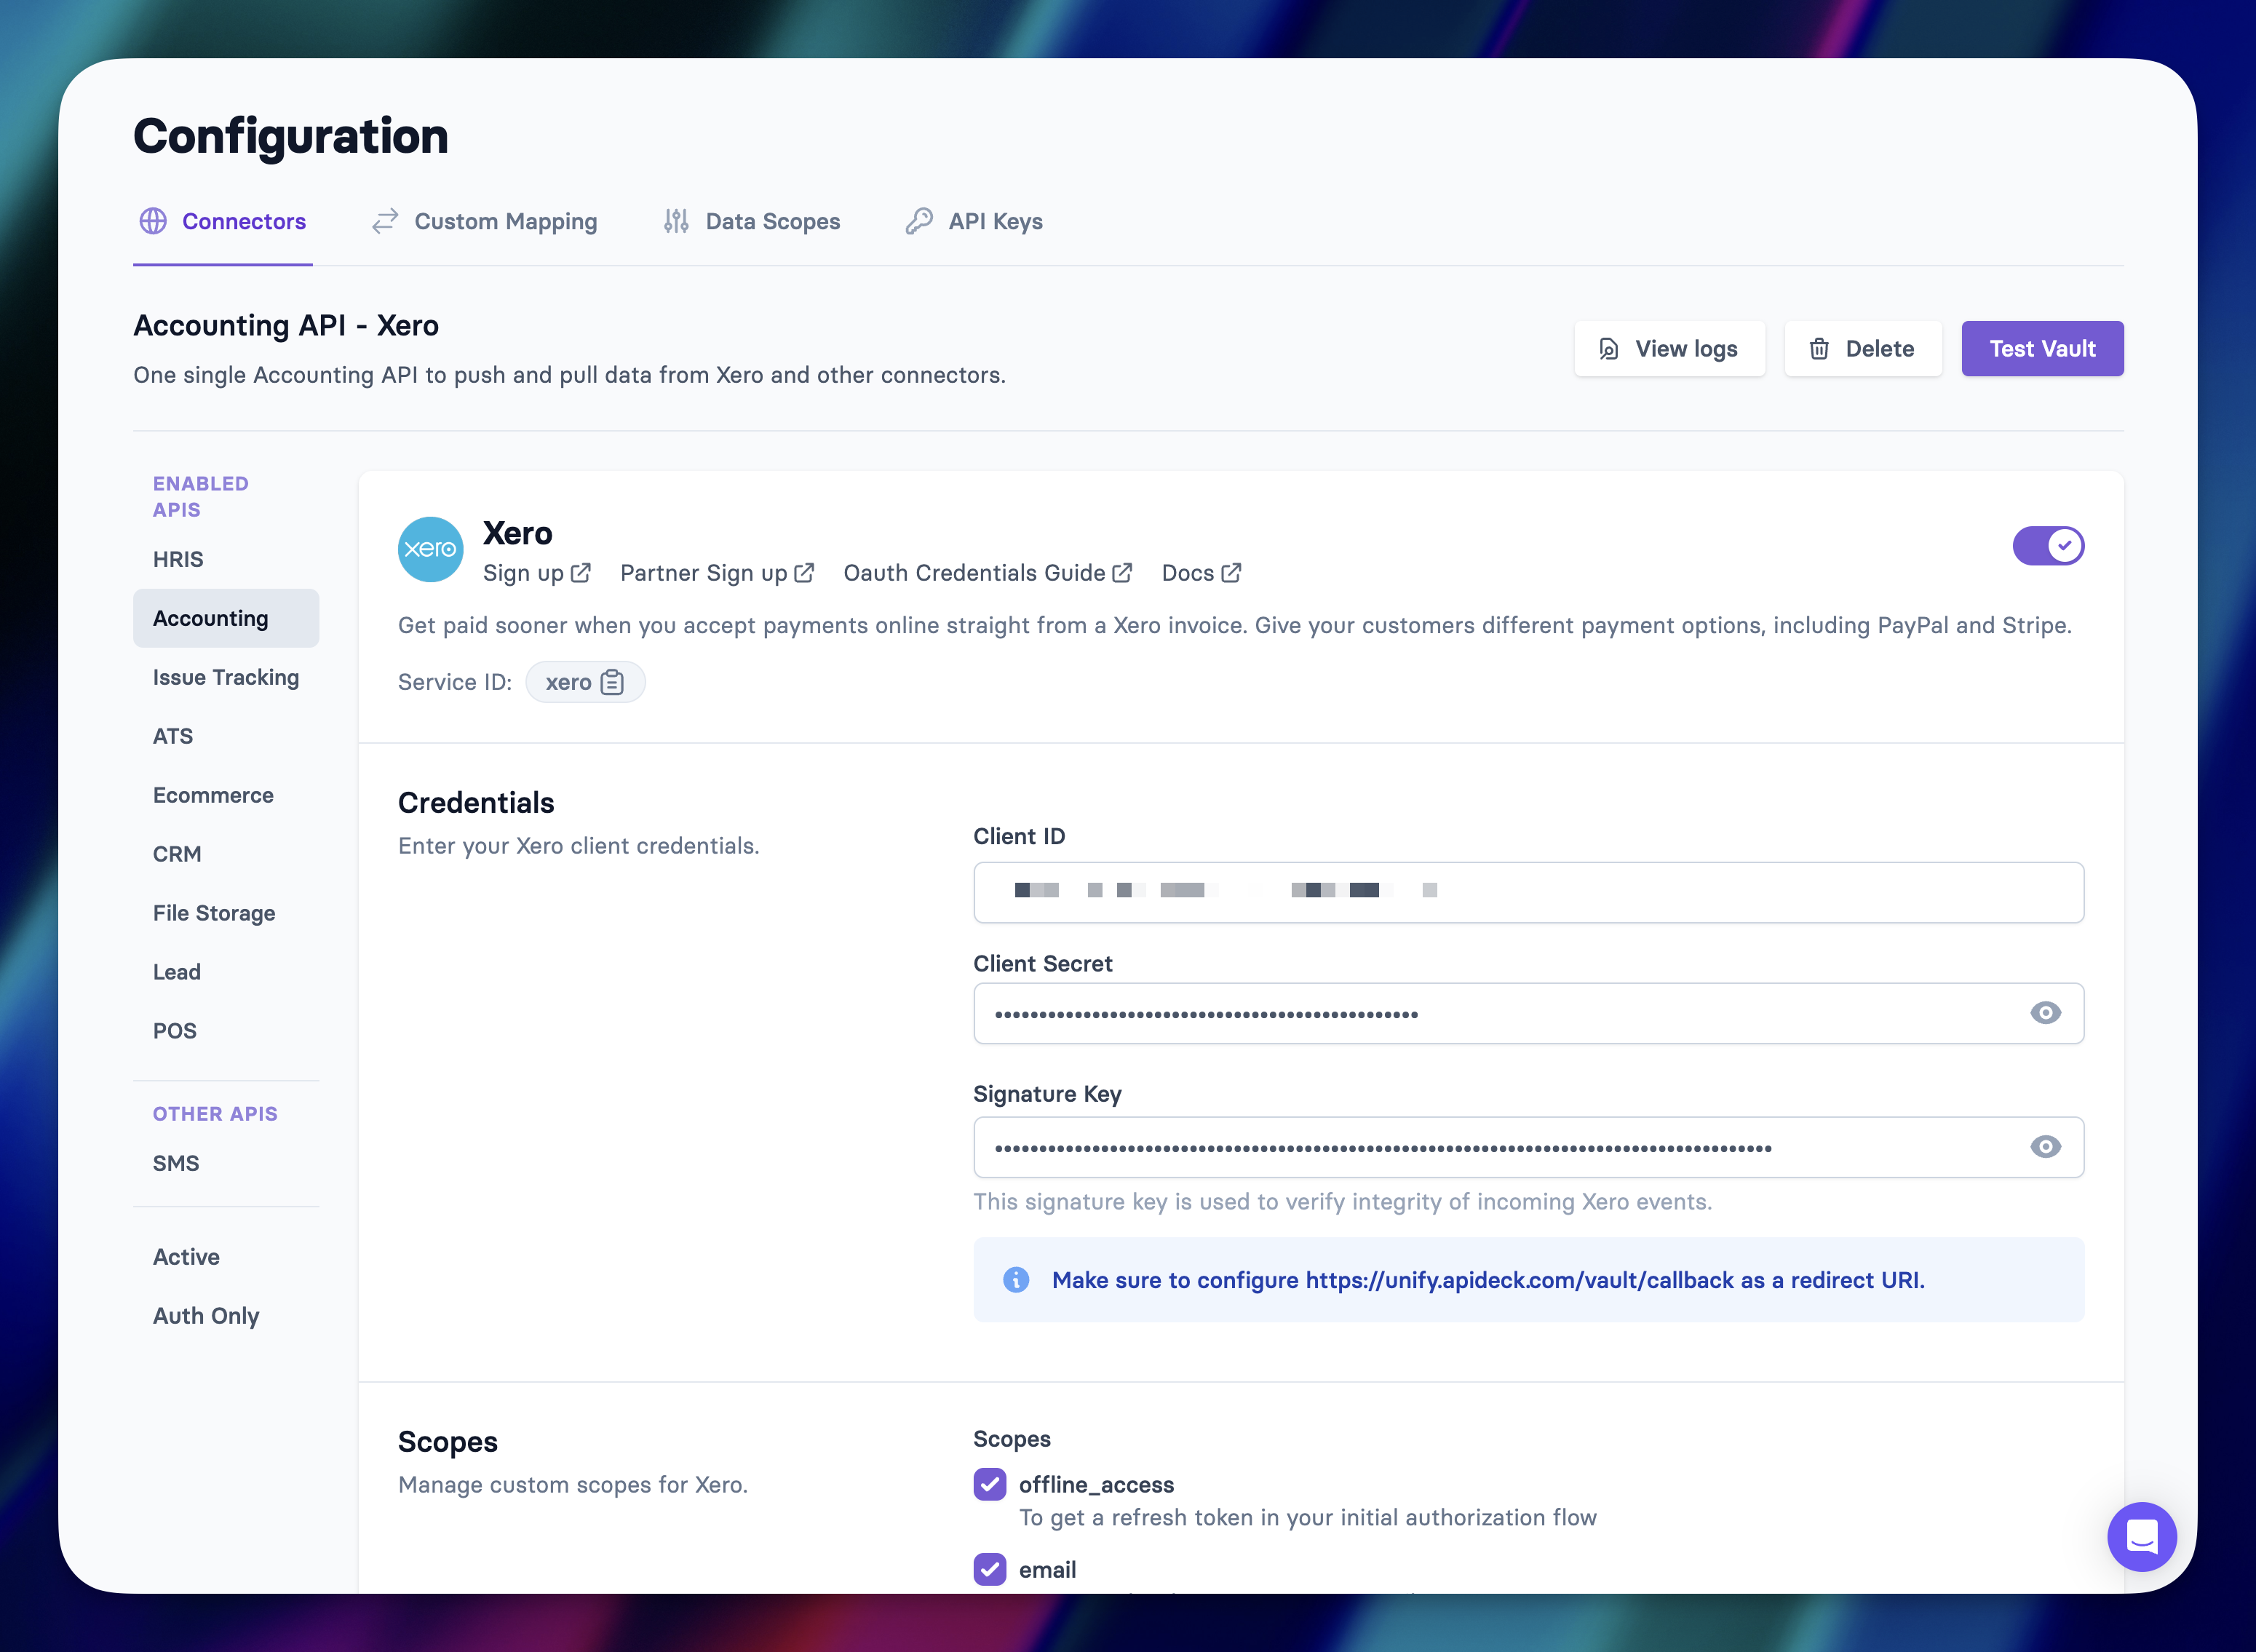
And here's how you can easily connect and manage permissions for your API Access. Go to the platform, select Xero, and add the required credentials that you obtained.
Save and then click on test-vault. Click Authorize, then authenticate via Xero.
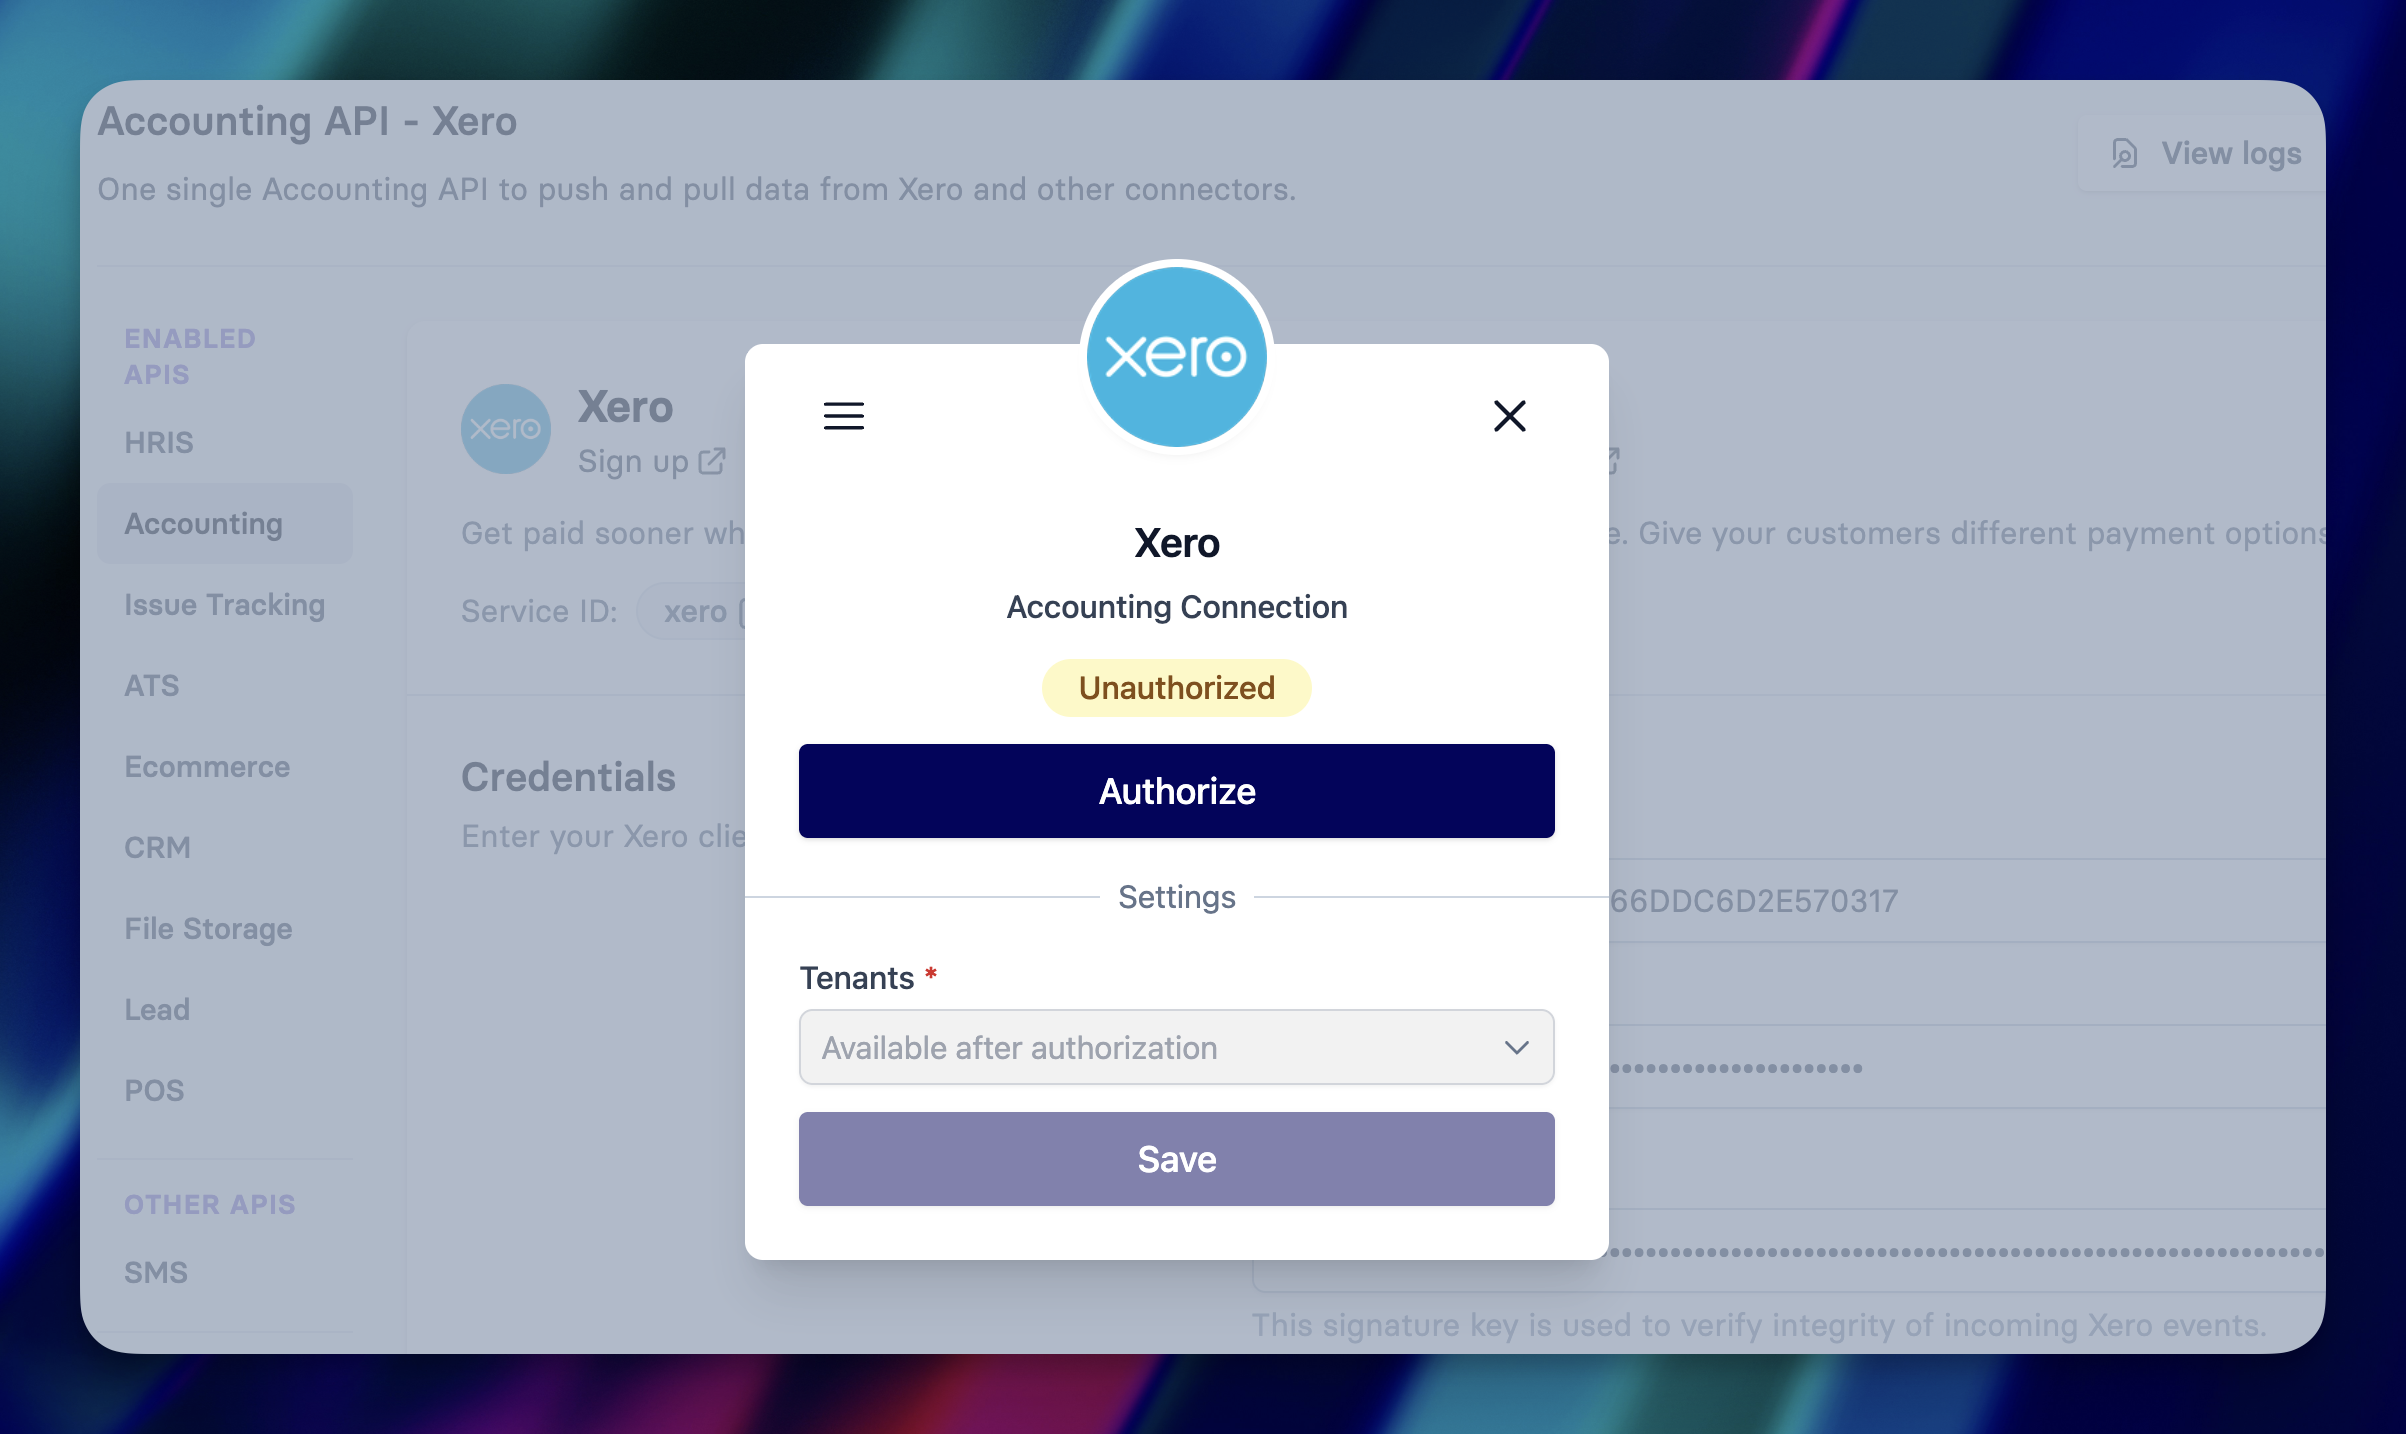
This will then authenticate and you can start using Xero via Apideck. After this, if you want to integrate with Xero:
- Xero Integration Guide
- Xero Docs to get your started.
Create a free Apideck account to get started, and build something awesome.
Ready to get started?
Scale your integration strategy and deliver the integrations your customers need in record time.


